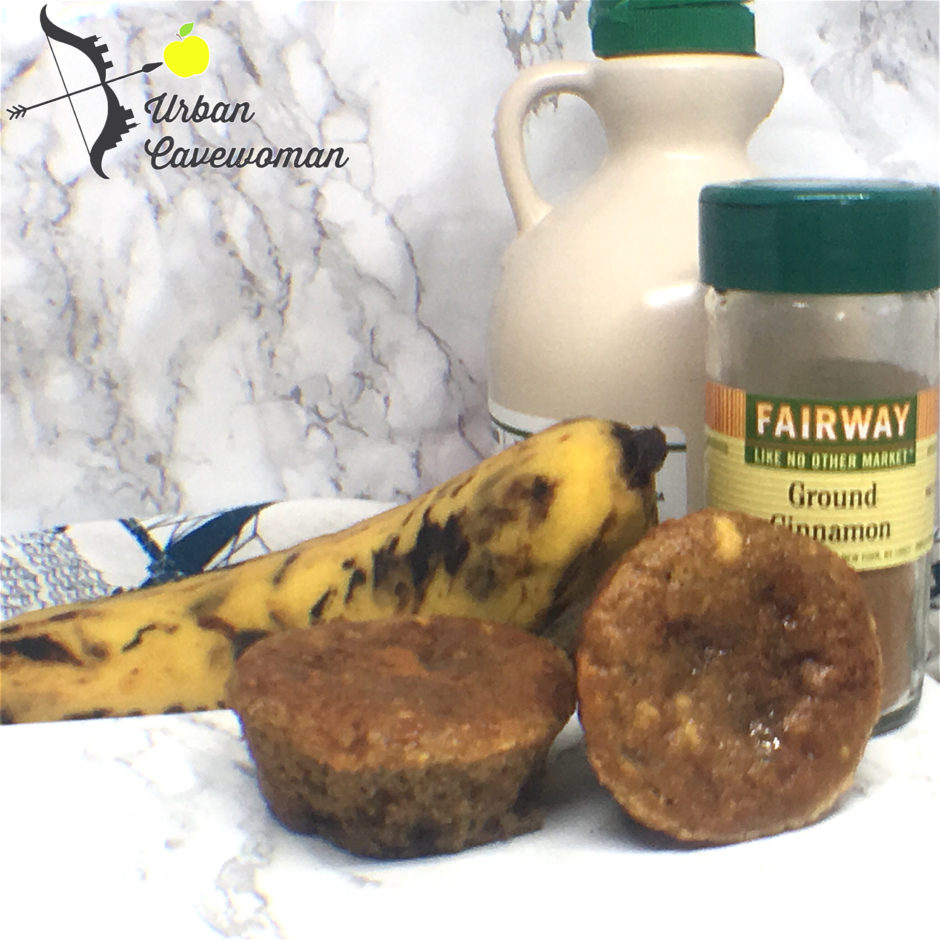
Plantain Cinnamon Paleo Microwave Mug Muffins

Posted on September 7, 2016

I am not a morning person. Never have been, and (in spite of forcing myself to wake up early), never will be. I may LOOK like I am awake, there is a 100% guarantee that I am basically sleep walking until my 3rd cup of coffee… or about 10am. Since my brain is typically off when I’m heading out the door, I like to keep my morning routine simple, and as idiot proof as possible. I am constantly working on recipes that are quick, easy, delicious, paleo, gluten free… and can travel (eggs are a bit difficult to eat on the subway).

For the past year my Pinterest feed has basically exploded with various types of mug muffin’s and cakes, but I could never find one that met my dietary restrictions.  So I set to work, and came up with these delicious plantain muffins – gluten free, paleo, and no coconut flour. The result is a very moist muffin, vaguely reminiscent of good banana bread, and very filling.

Plantains have always worked well for me in other baked goods, and they have the additional advantage of being FAR more affordable than some of the more exotic flours. Morning Tip: This batter can be refrigerated for up to two days, so I like to save half the batter in the fridge overnight, and nuke it up in the morning to make this recipe last for two days. Enjoy!

Plantain Cinnamon Paleo Microwave Mug Muffins

Ingredients

  • 1 yellow plantain (black spots are ok! they make it sweeter)
  • 1 egg
  • 1/2 tsp baking soda
  • 1/4 tsp ground cinnamon
  • 1 tbsp maple syrup (you can do less if you like)
  • 2 tbsp melted ghee (substitute palm shortening or coconut oil if you can tolerate it)
  • 1 tbsp Otto's Cassava Flour

Instructions

  1. Using an immersion blender, combine all of the ingredients together in a bowl, and blend until smooth.
  2. Grease the inside of a large mug, and pour half of the batter in (make sure that the batter does not fill up more than half the mug - this batter will RISE). Either reserve the remaining batter in a sealed container for the next day, or fill a second mug.
  3. Place your mug in the microwave (one mug at a time if you are making two), and microwave for 2 minutes, 30 seconds. Some microwaves may be a bit stronger, so if you think the muffin looks good at 2 minutes, you can take it out.
  4. Remove mug from microwave, and turn upside-down onto a plate or paper towel. The muffin should fall out nicely formed. Warning - it will be HOT, so let it cool before digging in. Enjoy on its own, or with a light sprinkle of cinnamon.

Notes

This recipe also works in a standard oven. Preheat oven to 350 degrees, and fill greased muffin tins with the batter. Cook for 20-25 minutes. Enjoy!
Schema/Recipe SEO Data Markup by Yummly Rich Recipes
https://www.urbancavewoman.com/recipes/breads/plantain-cinnamon-paleo-microwave-mug-muffins-gluten-free-coconut-free/


Oven Baked Chicken Wings: Two Ways (Paleo, Gluten, Nut and Tree Nut Free)

Posted on September 5, 2016

Happy Labor Day Weekend! For most of America, Labor Day is celebrated around a grill, enjoying the last official weekend of summer. Unfortunately, for those of us who are city dwellers, finding a grill can be somewhat of a challenge – and normally requires finding friends in the suburbs willing to host you for the day. This year, for the first time in I don’t remember how long, we decided not to participate in the mass exodus from the city, and have a little “stay-cation”.

Staying in the city on a holiday weekend can actually be incredibly relaxing. The typical fast paced, frenetic energy of the city is muted, and fellow city dwellers share an unspoken agreement that, for this short time, we are all just going to relax. I was able to enjoy shorter lines at the grocery, smaller crowds at the gym, and even come across a horse while walking our dog along the bridal path. In short, this weekend was near perfect. The only thing missing, a BBQ.

As is typical for holiday weekends, our local grocery was having a promotion on “family packs” for popular labor day weekend fare – and I got a fantastic deal on a family pack of chicken wings and drumsticks. My husband’s go-to favorite way to bake chicken wings, normally involves a gallon of Italian Dressing, or a vat of Frank’s Hot Sauce… yeah, SUPER paleo, right? Instead of indulging in the sugar and sodium packed marinades, we both decided to try a healthier way to make our wings. I wanted to come up with one version, that would mimic the Italian Dressing in a sweet and tangy way, and another that would give a nice kick, like the Franks.

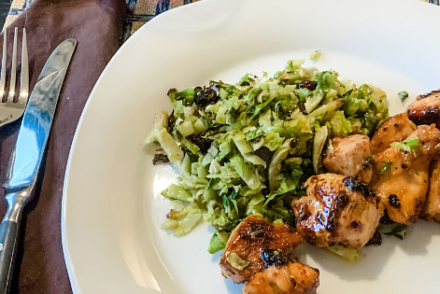
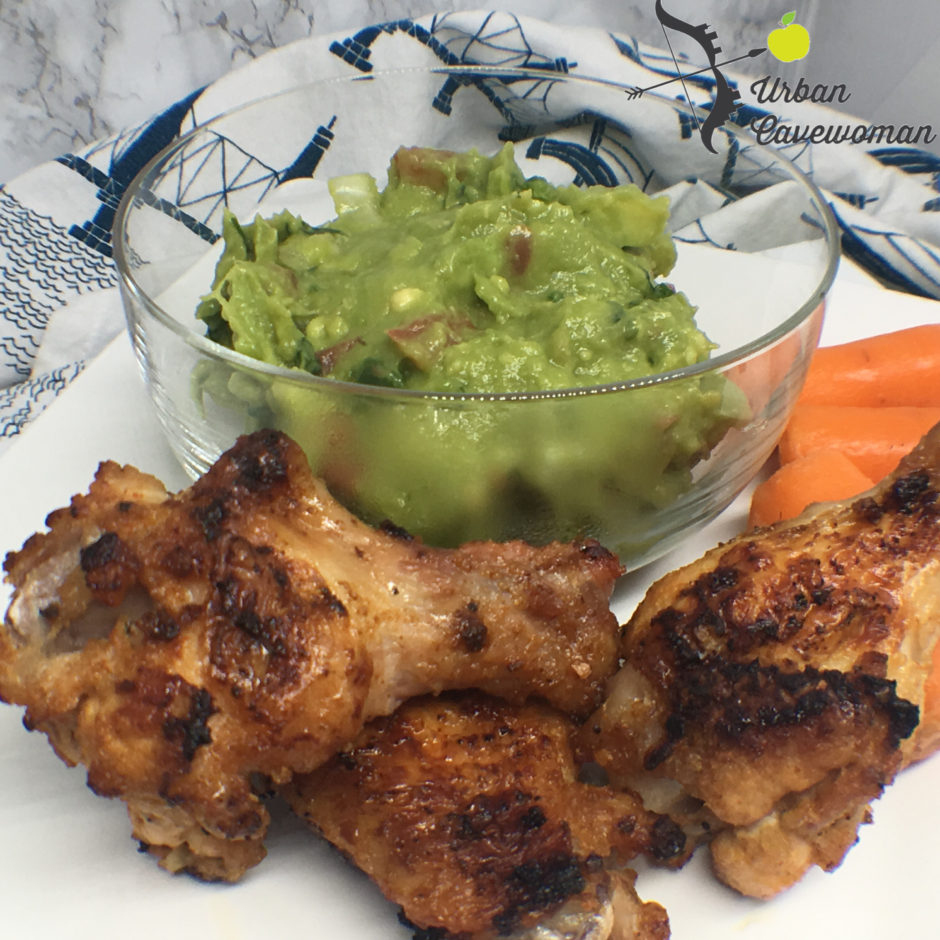
Here are the two marinades we whipped up for our wings. The first was a Sweet and Tangy marinade, and the other was a Spicy Cayenne Rub. After marinating for an hour, and roasting for about 30 minutes, these came out perfectly crispy, and oh so delicious. I was partial to the Sweet and Tangy wings myself, but my husband demolished the Spicy Cayenne. Together, these wings made the perfect Labor Day meal, served with some refreshing guacamole and veggies. Enjoy!

Oven Baked Chicken Wings: Two Ways (Paleo, Gluten, Nut and Tree Nut Free)

Ingredients

    Sweet and Tangy Marinade:
  • 1.5 lbs chicken wings and drumsticks
  • 5 tbsp fish sauce
  • 1 tsp minced garlic (or one large clove minced)
  • 1/2 tsp crushed red pepper flakes
  • 3 tbsp maple syrup
  • Juice from 1/2 lime
  • Spicy Cayenne Rub:
  • 1.5 lbs chicken wings and drumsticks
  • 3 tsp garlic powder
  • 3 tsp dried mined onion
  • 1.5 tsp cayenne pepper
  • 1 tsp salt
  • 1/2 tsp crushed black pepper
  • 2 tbsp melted ghee (you can substitute coconut oil if you are not allergic)
  • Juice from 1 lemon

Instructions

    Sweet and Tangy Marinade Directions:
  1. Combine all of the ingredients for the marinade (mix it up well).
  2. Place the chicken in a large zip-lock bag, and pour the marinade over it. Remove the air from the bag, and seal.
  3. Let marinate for at least 2 hours.
  4. Spicy Cayenne Rub Directions:
  5. In a small bowl, combine all of the dry ingredients for the rub. Pour in the lemon juice and melted ghee and mix well (this will be a little thick).
  6. In a large zip-lock bag, place the chicken, and pour the marinade over it. Remove air and seal the bag.
  7. Let chicken marinate for at least 2 hours.
  8. Cooking:
  9. Preheat oven to 500 degrees. Line two baking sheets with tin foil. If you have a crisper mat, you can use this as well, but the wings will turn out just as good without. I used one tray for the Sweet and Tangy, and another tray for the Spicy Cayenne to keep the flavors distinct. Lay the wings in a single layer on each sheet, and place in the oven. Note: pour all of the marinades out on to the trays from the bag. The Sweet and Tangy wings will have a lot more liquid - that is ok! It adds to the flavor. Cook wings for 20 minutes.
  10. Remove from oven, and flip all of the wings over. At this point, if there is extra liquid in either of the pans (there may be quite a bit in the Sweet and Tangy pan), drain this out. Put the wings back in the oven to cook for 10 more minutes.
  11. Remove wings from the oven, and serve hot with crudités and your favorite dip!
Schema/Recipe SEO Data Markup by Yummly Rich Recipes
https://www.urbancavewoman.com/recipes/entrees/oven-baked-chicken-wings/


Paleo Pumpkin Protein Biscuits

Posted on January 10, 2016

I love bread. I know you aren’t supposed to say that if you follow a paleo diet, but it is true. I love having bread in the morning, sandwiches in the afternoon, and a crusty roll with soup for dinner. When I lived in Paris (before finding out I was a celiac), I had bread for EVERY meal. I may never have been sicker, but I was oh so happy.

Sadly, by the time I was 24 it became apparent that as much as I loved bread, it did not love me back. I’ve tried since then to rekindle the romance with gluten free substitutes, but it is never the same. The imitation loaves lack the beautiful crunchy crust, the ability to soak up sauce, or feel complete accompanied by a healthy dollop of salty butter. Even after finding paleo, I still longed for a good french roll or buttermilk biscuit to bring me back to childhood, and a time when I had no idea what a carb or gluten was.

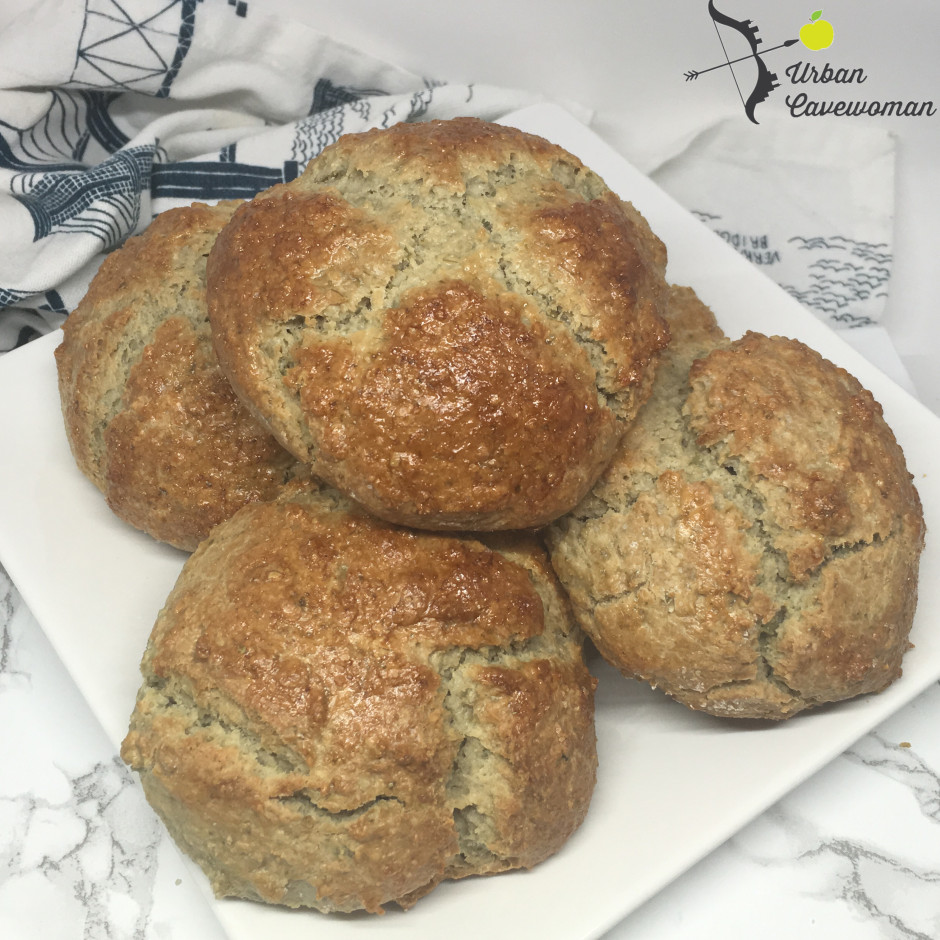
In a particular moment of weakness recently, I decided I had to try and create a paleo version of my favorite crusty roll. Most paleo and low-carb bread recipes use nut flours or coconut flour – both of which are off limits in our household due to our allergies. So, I started experimenting with some of the  I had lying around, and combined it with some . The result was amazing! The rolls were dense, and a bit crumbly, but oh so delicious. The pumpkin seed meal has a bit of a bitter flavor, so I compensated with some extra maple syrup. However, if you are pairing with a flavorful soup or stew, you can easily reduce the syrup by half and the bitterness of the pumpkin will not be noticed.

Now, these are not Whole30 compliant, and probably not going to be great for weight loss if incorporated as a regular part of your diet. But, if you just need a bread fix – they are the perfect treat to satisfy your craving.


Paleo Pumpkin Protein Biscuits

Paleo Pumpkin Protein Biscuits

Ingredients

  • 6 tablespoon warm water
  • 2 tablespoons maple syrup (see note)
  • 1 tablespoon melted ghee
  • 1 tablespoon melted palm shortening
  • 2 teaspoon yeast
  • 1 egg +1 egg white (beaten)
  • 2.5 cups pumpkin seed powder
  • 2 cups cassava flour
  • 1 teaspoon kosher salt
  • 1 egg white to be used for egg wash

Instructions

  1. Preheat oven to 375 degrees. Line a baking sheet with non-stick aluminum foil (regular foil will also work).
  2. In a large mixing bowl, combine the water, yeast, maple syrup, ghee, and palm shortening. Give a quick whisk (so well combined) and let sit for two minutes.
  3. Whisk in the mixed egg into the yeast mixture until fully combined. Then, slowly, mix in the pumpkin seed powder. Once that has been fully combined, start to sift in the cassava flour.
  4. The dough will be very sticky, so you may want to coat your hands in some shortening or oil. Grab about a golf-ball size of dough and roll it into a ball. Place the dough balls onto the aluminum foil lined baking sheet. When all of the dough has been used, take a knife and lightly scour an "X" across the top of each roll. Firmly whisk the final egg white so that it is slightly frothy. Brush the egg white over all of the rolls (this will get them nice and brown when they cook).
  5. Place in oven, and bake for 30 minutes.

Notes

You can reduce the maple syrup by half if you do not find pumpkin seeds to be too bitter, or if you plan on serving the rolls with a soup/ stew that will mask the bitterness. Personally, I like the flavor of using only 1 tablespoon, but my husband found the taste a bit too much on its own.

Schema/Recipe SEO Data Markup by Yummly Rich Recipes
https://www.urbancavewoman.com/recipes/breads/paleo-pumpkin-protein-biscuits/

Paleo Fish and Chips

Posted on July 15, 2015

I’ve written before about comfort foods, and their importance in the success of sticking with any diet. One of the most popular comfort foods in our home is a good English fish and chips. I still remember the first time I had fish and chips. I was about 5, and we were visiting family in London. While I’d been to England several times before, this was the first time we were exploring the city. The first few days of our trip were focused on all of the typical sites you would want to see; changing of the guard, tower of London, Buckingham palace, Portobello road, all of it. I had had my fill of tea and scones and finger sandwiches – and was about to turn into a giant bowl of clotted cream with berries (delicious by the way). The one thing I had yet to enjoy was a classic fish and chips.

Determined to get the most out of our time in the city, and find the most authentic fish and chips we could, my mother hailed a cab. As soon as we got in, she asked the driver to take us to the best fish and chips in London. The cab started off down streets we had never seen, and shortly brought us down to the docks. The driver turned around and chatted with my mother for a minute, and then got out of the cab. A few minutes later, he returned with three news paper parcels dripping with grease. The smell was amazing. I unwrapped the greasy newsprint and tucked into one of the most fantastic culinary experiences of my life.

When I discovered I was a celiac, I mourned the loss of my battered fried fish. However, over the years, I’ve played around with various gluten free and paleo friendly ways of doing a breading, and have been very pleased with the results of breading in pork dust . Normally, I use pork dust  to bread chicken, but it also works very well with fish. Thankfully, after some experimenting, I have come up with a fail safe paleo fish and chips to satisfy my cravings.

They  key to preparing a breaded fish cutlet like this is to use the right type of fish. Some fish can be too delicate to handle the breading process (egg wash and then the “breading” in pork dust ). I have found tilapia stands up quite well during this process. You can either oven bake it, or fry lightly in oil on the stove top – either way it will be delicious.

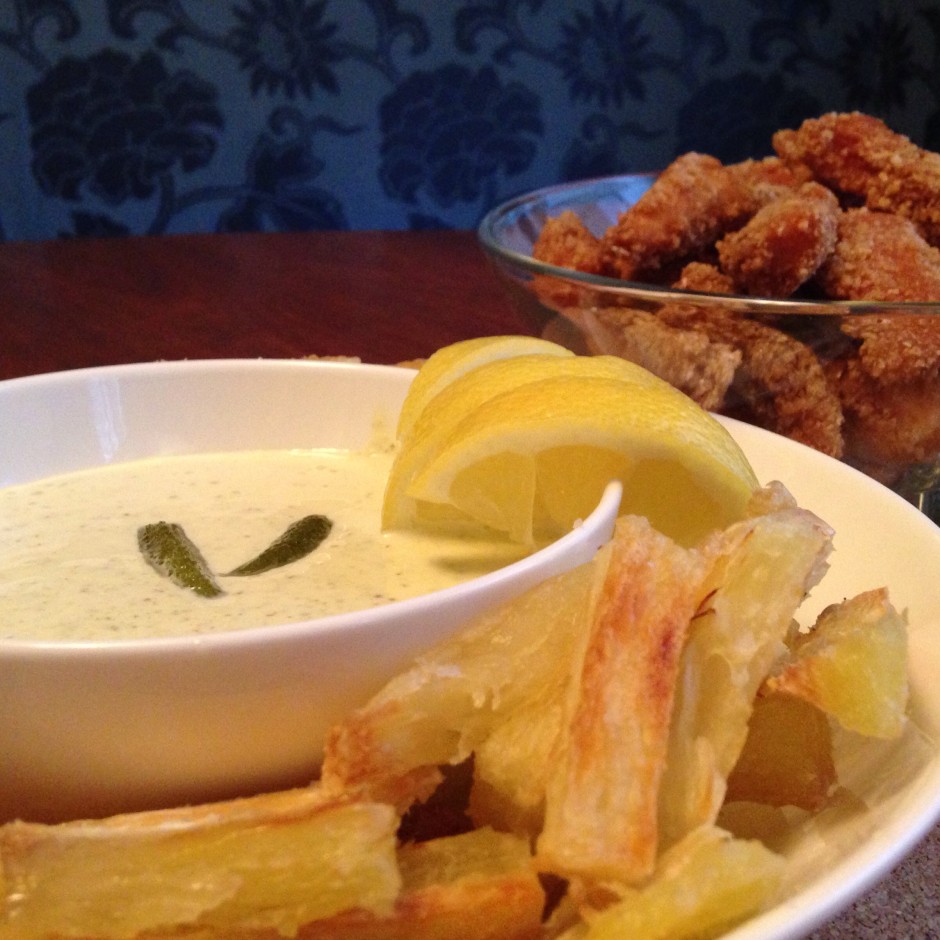
Classic fish and chips have thick cut fries served with them. To be honest, I’ve never liked that style. Personally, I like the thinner crispier fries that the overly potato-ey version. However, to keep with the classics, I like to use Yucca to replicate the thick cut fries. Coat them in olive oil and salt, and bake at 425 for 15-20 minutes. Delicous.

The final piece to complete the meal is an area of some contention for many. There are purists out there who feel very strongly a good fish and chips should only be accompanied by malt vinegar.  While I love the malt vinegar style, it sadly isn’t paleo, so I serve my fish and chips with a delicious creamy tartar sauce. This tartar sauce is one of my favorite things; slightly tangy and briny, it is perfect with fish, as a dipping sauce for fries, or even as a topper on a burger. Try this sauce, and I promise you will be finding excuses to put it on everything.


Paleo Tartar Sauce

Paleo Tartar Sauce

Ingredients

  • 1 cup light olive oil
  • 1/2 lemon
  • 1 egg
  • 1/4 cup gherkins (chopped)
  • 1 tbsp Apple Cider Vinegar
  • 1 tbsp pickle juice
  • 1 tsp coarse stone ground mustard
  • 1 tbsp dill (optional)

Instructions

  1. In a wide mouth mason jar, pour olive oil and an egg. Juice out the half a lemon into the jar straining out seeds, but getting lots of pulp in (use a spoon to get as much pulp in as you can). Using an immersion blender, mix from the bottom of the jar pulling up to get a nice thick mayonnaise.
  2. Add in the chopped gherkins, vinegar, pickle juice, mustard and dill. Blend again for a few seconds with the immersion blender until well mixed.

Notes

Keep this in the fridge for up to a week. Serve with fish and chips, fries, or on burgers.

Schema/Recipe SEO Data Markup by Yummly Rich Recipes
https://www.urbancavewoman.com/recipes/condiments/paleo-fish-and-chips/

Back to top