Whole30 Challenge – Week 1

Posted on May 13, 2015

We all have those friends, you know the one’s I’m talking about. They are the ones that go on some crazy crash diet or juice cleanse and it is like they have found God. All they can talk about is how AMAZING it feels to “cleanse the toxins” out of their body, or how they are “really not hungry at all” and that “you get used to it”. Forget having a meaningful conversation with them – life is just about their diet.  I hate to admit it, but I have even BEEN that person. I cringe at the memory of trying to convince my friends that they absolutely HAD to try [insert fad diet here] – that it will change their life. Inevitably, after you have finished your diet, and return to the world of the eating, your sanity will slowly return (as will the pounds that you shed).

When my husband and I discovered Whole30, and started to see and feel the results, I will admit it, we became THOSE people. We wanted all of our friends to share in this amazing discovery, and couldn’t understand how everyone wasn’t doing this! The biggest issue we discovered, was that most of our friends were intimidated by the cooking.  Most of them would say something like “well it works for you because you like to cook” or “that just sounds like too much work”. After two years of periodic Whole30’s, and living a mostly paleo life, I barely notice that I tend to cook more than most of my friends, but it is true. I can see how the cooking could be an intimidating barrier to some. I started to notice a trend, of friends saying something along the lines of “if you cook my meals for me I could easily do this.” Of course, i thought they were joking … but what if they weren’t?

Last week I was talking with two of my friends at work, and the Whole30 came up. I started to explain what it was, and how it worked. Sure enough, I got the usual response “too much work” – “could do it if you cooked for me”. So, I said okay. I won’t cook FOR you, but I will cook WITH you. We would cook (or prepare) food together on Sunday, and have it to eat throughout the week. Once they got used to it, we could break up the meals and take turns bringing in lunches and breakfasts for the three of us.

This Monday marked Day 1 for our group Whole30 Challenge. Saturday night I sent out a menu for the week, and assigned everyone a portion of the shopping list. Sunday we gathered for our first cooking party. While cooking may be intimidating to do on your own, it is a lot of fun in a group. We had the music blasting, and with so many of us chopping, the work was done quickly.

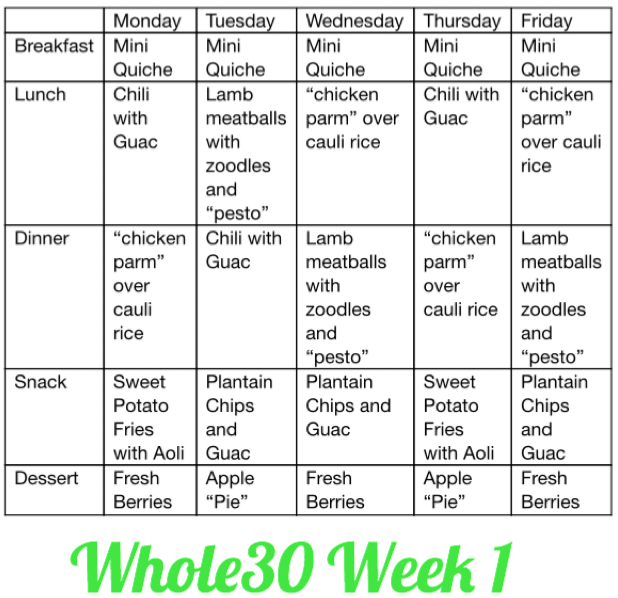
To make it easier, I decided we would prepare one breakfast for the week, and 3 “entrees” that could be eaten for dinner or lunch and provide variety throughout the week. I also thought it was important to incorporate snacks and dessert, so no one felt deprived. Here was our menu for the week:

  • Breakfast: Mini (crustless) Quiche, filled with spinach, mushrooms, onions, nutritional yeast and ham.
  • Entree 1: Chili Con Carne with Guacamole
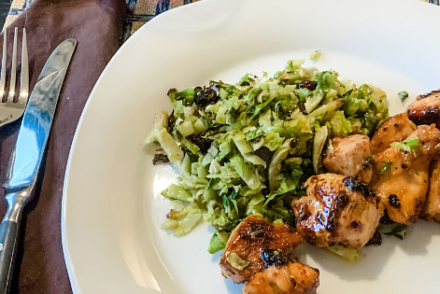
  • Entree 2: “Chicken Parm” and Cauliflower Rice
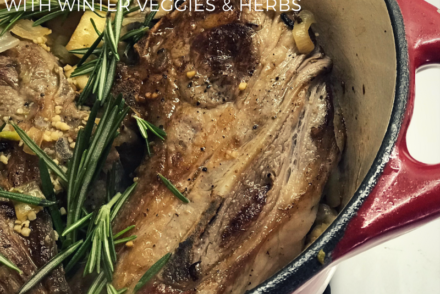
  • Entree 3: Lamb Meatballs with Zoodles and Pesto
  • Snack 1: Sweet Potato Fries with Aioli
  • Snack 2: Plantain Chips and Guac
  • Dessert 1: Fresh Berries
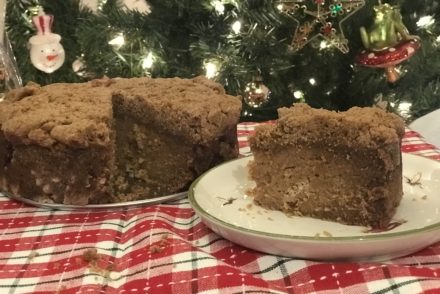
  • Dessert 2: Apple “Pie”

I will post all of the recipe’s throughout the week, and update you with our progress, but so far everyone is enjoying our little “experiment”. The cooking party was a wonderful way to take the intimidation out of the cooking. We ended up having a great afternoon, and everyone went home excited and with their week’s supply of food locked and loaded. All that is left to do for the rest of the week is the easy part – enjoying the delicious food!

Plantain Paleo Brownie

Posted on April 26, 2015

Do you ever just NEED chocolate? There are some people who really could take it or leave it, but I am not one of those people. I NEED chocolate – almost as deeply as I need coffee. The best part about chocolate, is that it can be made into so many delicious things. 

One of the most classic and beloved chocolate treats of all has to be the brownie. This staple of school bake sales is by far one of my more favorite indulgences. Unfortunately, the traditional brownie is FAR from healthy – especially if you make them the REALLY good way. I still remember the first time I finally got a hold of my grandmother’s brownie recipe. It consisted of two sticks of butter, a package of bakers chocolate, sugar, flour, and (I’m not joking) half a dozen eggs. I nearly died from shock – though I’m sure the insane quantities of fat that were loaded into the decades of brownies I had been consuming were probably helping in that effort as well. It truly was death by chocolate… but what a way to go.

Though no brownie will EVER live up to my grandmother’s recipe, this recipe comes close. Now, I know there are those of you out there who couldn’t believe that a paleo brownie could even come close to the real thing. But trust me on this, I promise this recipe will not disappoint.

The key to this brownie is the plantains. This recipe calls for two yellow plantains – and you need to pick the right type of plantain to get the texture you want. The texture of the plantain will be reflected in the consistency of the brownie. If you would like fudgier brownies, find a plantain that is a little soft. Don’t get one that is black or mushy as this will result in too strong a flavor from the plantain. 

Another secret to this treat is that instead of using butter/ ghee/ as the fat in this recipe – I use cocoa butter . is a great addition to these brownies. Not only does it help keep the brownie moist, but it heightens the chocolate flavor. Give these brownies a try, and I promise you that you won’t regret it.

Plantain Paleo Brownie

Plantain Paleo Brownie

Rich and chocolaty brownie you won't believe is paleo!

Ingredients

  • 2 eggs
  • 2 yellow plantains
  • 1/3 cup cocoa powder (plus some for dusting the pan)
  • 1/3 cup melted (you can substitute melted if you like)
  • 1/4 cup maple syrup
  • 2 teaspoons vanilla extract
  • 1 teaspoon baking soda
  • 1 cup 
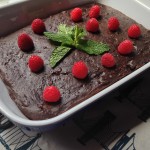
(or dairy free chocolate chip of your choice)
  • Palm shortening to grease the pan

Instructions

  1. Preheat the oven to 350 degrees.
  2. Combine all ingredients but the chocolate chips in a blender, and puree until smooth. Add in the chocolate chips and pulse a few times until the chips are distributed in the batter.
  3. Grease a brownie pan with palm shortening and lightly dust with some cocoa powder (this will prevent the brownies from sticking to the pan). Pour the batter into the pan. Bake for 30-35 minutes, until brownie is a bit "bouncy" to the touch and a toothpick comes out clean.
  4. Let cool.

Notes

Serve topped with fresh berries. Store in airtight container for up to 5 days (if they last that long).

Schema/Recipe SEO Data Markup by Yummly Rich Recipes
https://www.urbancavewoman.com/slider/plantain-paleo-brownie/

Just Like Sugar – Paleo Sweetener Review

Posted on April 26, 2015

Though sweets should always be eaten in moderation when living a paleo lifestyle, I personally think that illuminating them completely is unrealistic. The important thing to remember when indulging, is what you choose to use as your paleo sweetener. Obviously, highly refined white sugar, corn syrup and agave are all big no-no’s if you are trying to maintain a paleo lifestyle.

There actually are a lot of paleo sweetener options, but they all have the downside of being caloric. If you are trying to have a lower calorie diet (or are used to using fake sweeteners) there is actually a really good paleo approved option for you. . This product is made from dried chicory root, and has zero (0) calories, carbs, fat or sugar for a 100 g serving.  The table top variety seems to be the best tasting, and easily dissolves in liquids ( a huge plus if you like to drink iced beverages). It doesn’t taste completely like table sugar, but also doesn’t have that same after taste that Stevia and other sugar substitutes have.

Pros:

  • Will dissolve easily in liquid
  • Safe for diabetics.

Cons:

  • Pricey
  • Has a VERY slight aftertaste.

Verdict? If you are a diabetic, or watching your sugar intake, this is a great option. It is also great to keep on the table if you want to use to sweeten beverages. However, from a taste perspective, when cooking I will still opt for honey, maple syrup or maple sugar.


Tiger Nut Milk

Posted on April 26, 2015

When my husband and I decided to go paleo, one of the most difficult things for me to give up was milk. Mostly, because my coffee felt so sad and lonely without it. Most of my friends who were trying the Whole 30 or practicing a paleo lifestyle were able to get their “milk fix” through coconut or almond milk. unfortunately, due to allergies, neither of those options will work in our household.

Even though paleo recipes are supposed to be dairy free, a lot of them will require a milk substitute of some sort – and it is almost always coconut or nut based. I was determined to find an option that would work for my family. After experimenting with a few options using hemp or flax seeds, I had almost given up that i would find a tasty and satisfying alternative to milk. Then something magical happened – I discovered the tiger nut!

In spite of it’s name, the is NOT a nut; it is a tuber (you know, like potato’s and cassava). According to the tiger nut USA website,  they are not only nut free, but also gluten free, dairy free and ALLERGY free!!! Amazing. From everything I read, the tiger nut appeared to be an amazing super food. Thought to be the first crop cultivated by humans, definitely paleo, and packed with nutrients. It is high in fiber, magnesium, potassium, iron, zinc, copper and (according to a review in Paleo Mag Online) “have a macronutrient ratio almost identical to that of human breast milk.”

Are you as excited as I am? I was shocked that I hadn’t heard about this amazing little tuber before! The tiger nut is most commonly used in horchata, a creamy and refreshing beverage sweetened with dates. Once I discovered that, I knew I could make tiger nut milk as my dairy substitute. Basing it off of a combination of a horchata recipe and an almond milk recipe, I came up with a delicious tiger nut milk. I’ve used this in several recipes, and it substitutes perfectly for almond milk. It is also very refreshing in my morning coffee, or on it’s own over ice.

Shopping Notes:

To make tiger nut milk, you will need a few things.

Tiger Nut Milk

Tiger Nut Milk

Nut free and coconut free paleo milk substitute.

Ingredients

  • 5 oz Raw
  • 6 cups water
  • 1 teaspoon cinnamon
  • 1/2 tablespoon
  • 1 Bourbon Vanilla bean

Instructions

  1. In a 24 oz mason jar, add the 5 oz of tiger nuts, vanilla bean, maple sugar and cinnamon.
  2. Fill the mason jar with boiling water. Cover and let sit in the fridge overnight (18-24 hours).
  3. Empty the contents of the mason jar into a blender. If your blender has measurement markers, fill it up with water up to the 6.5 cup line. If it doesn't, add 5 cups of water. Blend for about 2 minutes, or until the liquid is a milky white, and all of the pulp is finely ground.
  4. Using a nut milk bag, strain out the tiger nut pulp, keeping the liquid. Viola!

Notes

If you want, the tiger nut pulp can be used in baking. If you let it dry out and store it in an air-tight container, the pulp can be kept for several days and used in some great recipes!

Schema/Recipe SEO Data Markup by Yummly Rich Recipes
https://www.urbancavewoman.com/slider/tiger-nut-milk/

Back to top